

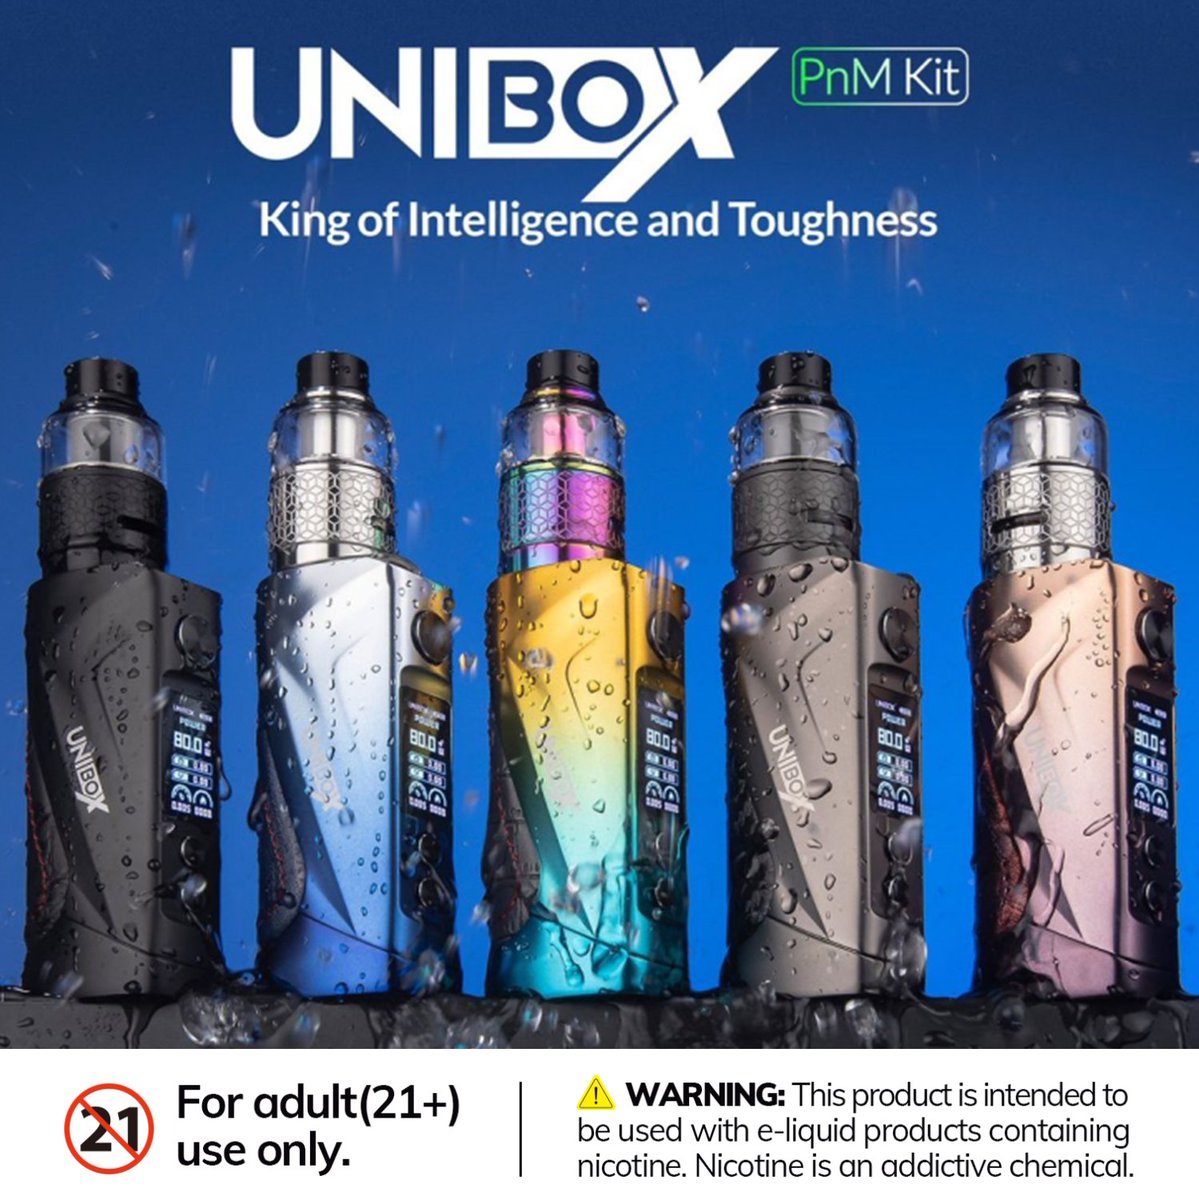
Hello and welcome to my latest review for Oxva. I’ve been really looking forward to receiving this one for review and it finally arrived after what seemed like a long wait. Most likely because I was looking forward to it. This time I’ll be covering the Oxva Unibox kit to the best of my ability. The Unibox is a collaboration between Oxva and VapX. It’s been a while since VapX came out with a box mod so maybe this is a sign they are looking to get back in the game. Like a few other mods we’ve seen on the market, the Unibox is IP68 rated waterproof, dustproof, and shockproof. The Unibox uses a single 18650 battery and has an output range of 5-80 watts along with a voltage output range of .5-9 volts. Also included in the kit is the PnM (Pyrex and Magnetic) Super tank that was also included in the Vativ kit that I previously reviewed. You might think “oh, it’s just another 18650 mod kit”. Well, this mod is compatible with a software package for your computer called Unitool which is somewhat reminiscent of Escribe and allows you to make changes to the mod through the software. I will give a basic outline of the program in my review.

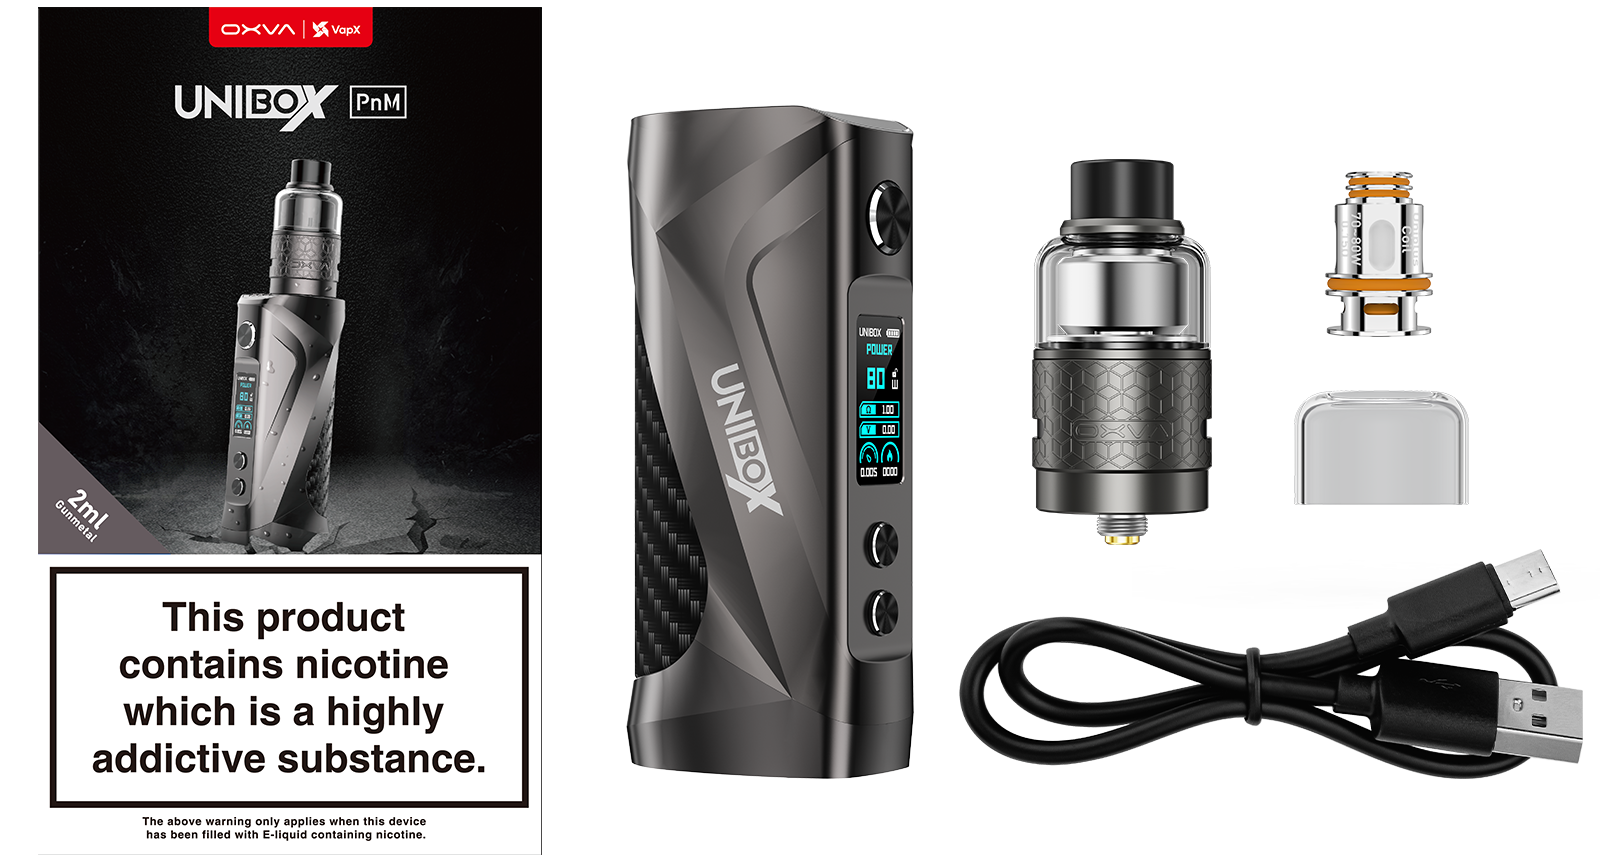
WHAT’S IN THE BOX?
1pc OXVA Unibox Mod
1pc OXVA Unione PnM Tank
1pc OXVA 0.15ohm Uniplus Coil (pre-installed)
1pc OXVA 0.3ohm Uniplus Coil
1pc Bubble Glass
1pc Type-C Cable
1pc User Manual
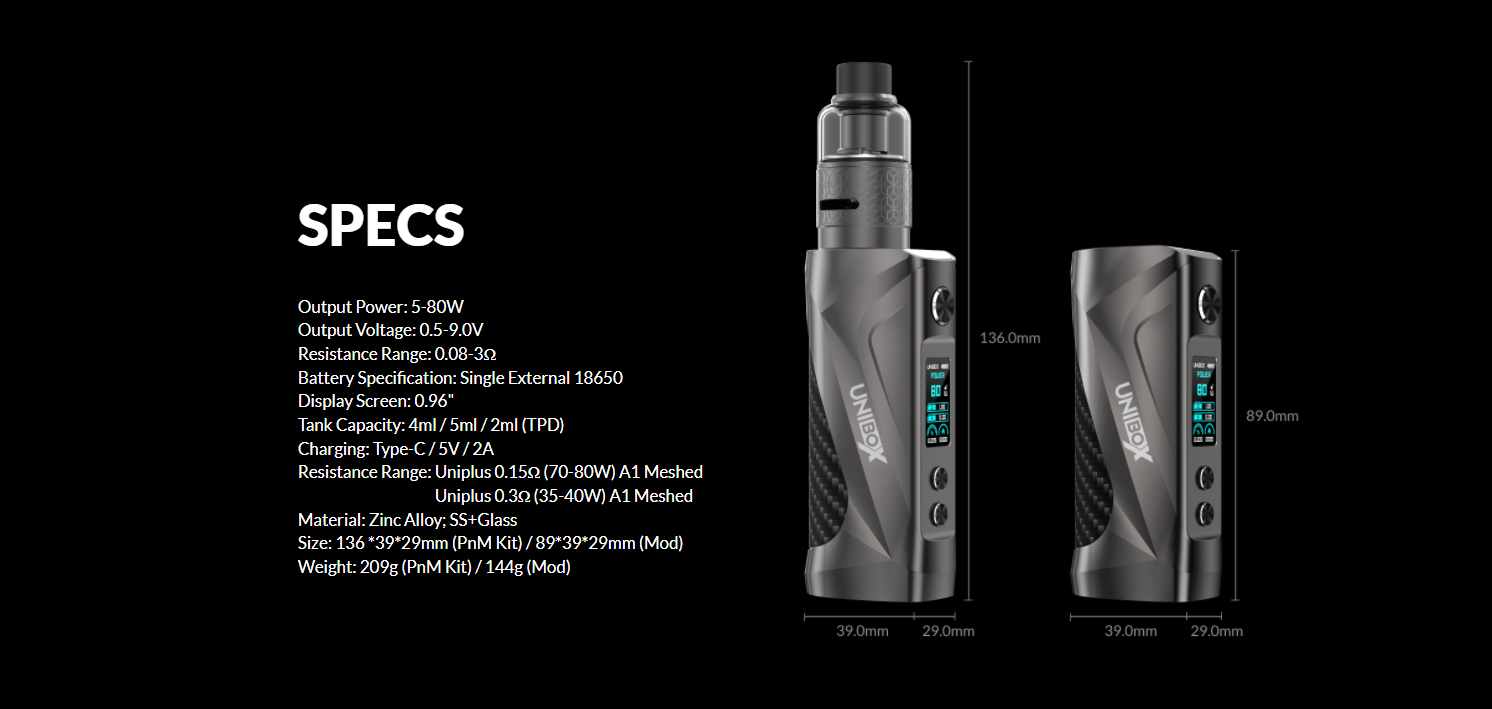
SPECIFICATIONS:
Output Power: 5-80W
Output Voltage: 0.5-9.0V
Resistance Range: 0.08-3Ω
Battery Specification: Single External 18650
Display Screen: 0.96"
Charging: Type-C / 5V / 2A
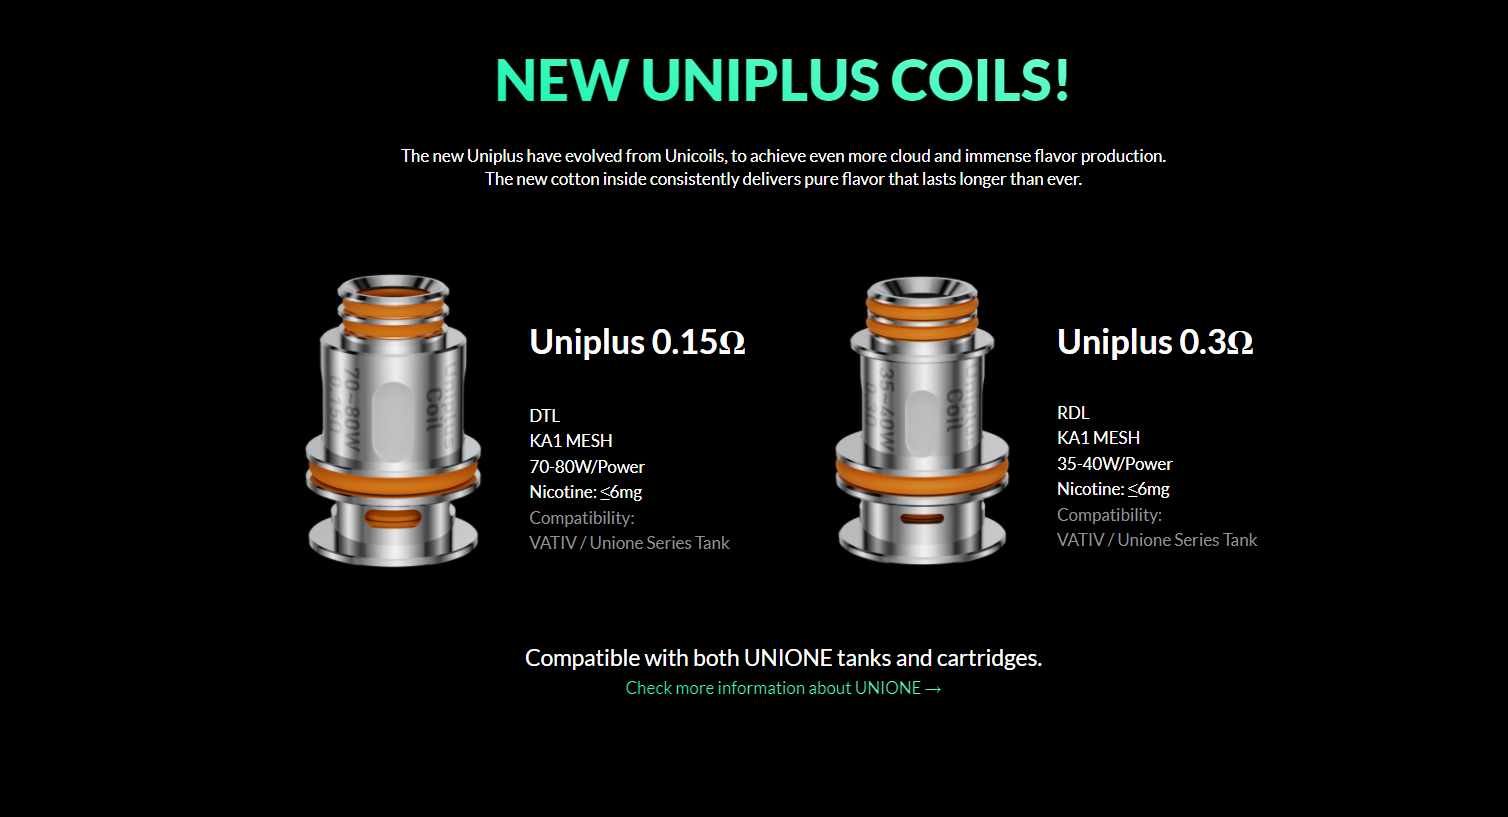
Resistance Range: Uniplus 0.15Ω (70-80W) A1 Meshed
Resistance Range: Uniplus 0.3Ω (35-40W) A1 Meshed
Material: Zinc Alloy; SS+Glass
Size: 89*39*29mm (Mod)
Weight: 144g
FEATURES:
• Revolutionary Unitool
• Ohm’s law, coil wrapping and battery drain for DIY beginners
• Power Mode & Voltage Mode, Temperature Control, VPC Mode, Bypass Mode
• Battery Performance Test
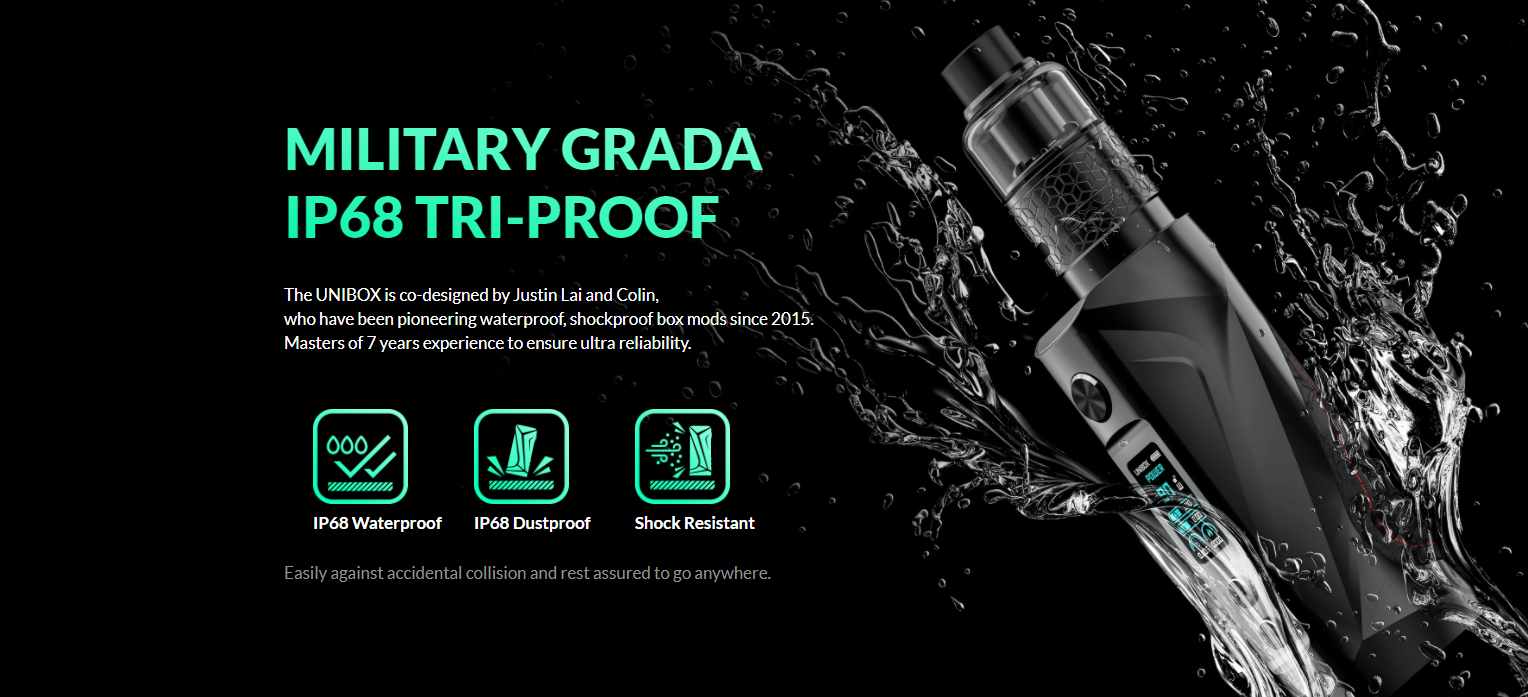
• IP68 waterproof, dustproof, and shock resistance
• For both RDL and DTL Vape
• Compatible With PnM super tank
• Powered By Single External 18650 Battery
• Max 80W Output

INITIAL THOUGHTS:
The packaging for the Unibox kit shows just a picture of the Unibox with tank on the front with a marking in the corner stating it is 5ml. That is when using the included bubble glass. The pre-installed tank is 4ml. The back of the box gives some general information about the Unibox and gives a list of the contents as well as the company information for Oxva.
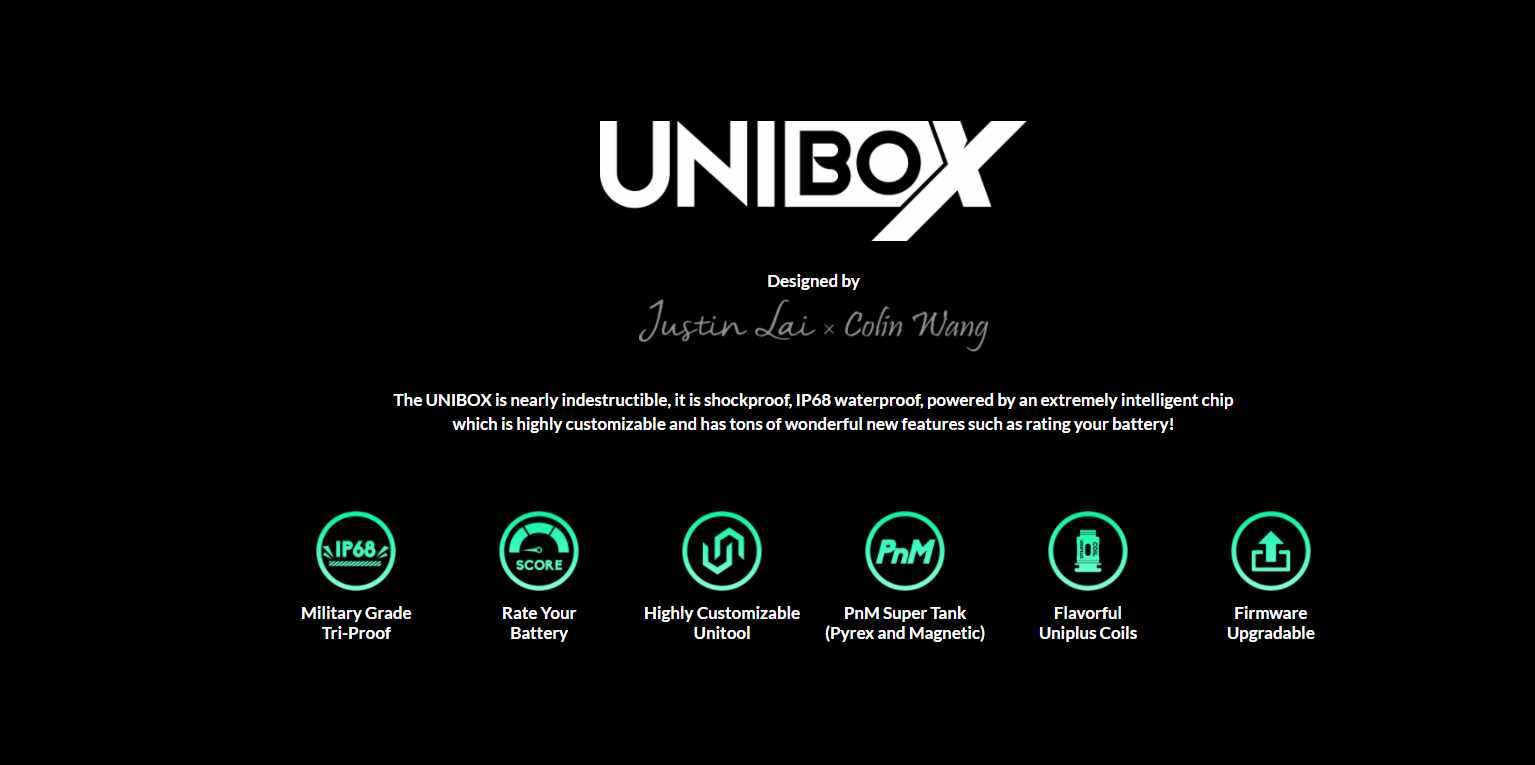
One side of the box lists some of the features of the Unibox while the other side simply states that the Unibox was designed by Justin Lai of Oxva and Colin Wang of VapX. I have to say that the Unibox does remind me of the VapX Meteor mod some. However the Meteor was smaller and had a built in battery that you could fast charge with the appropriate charger.
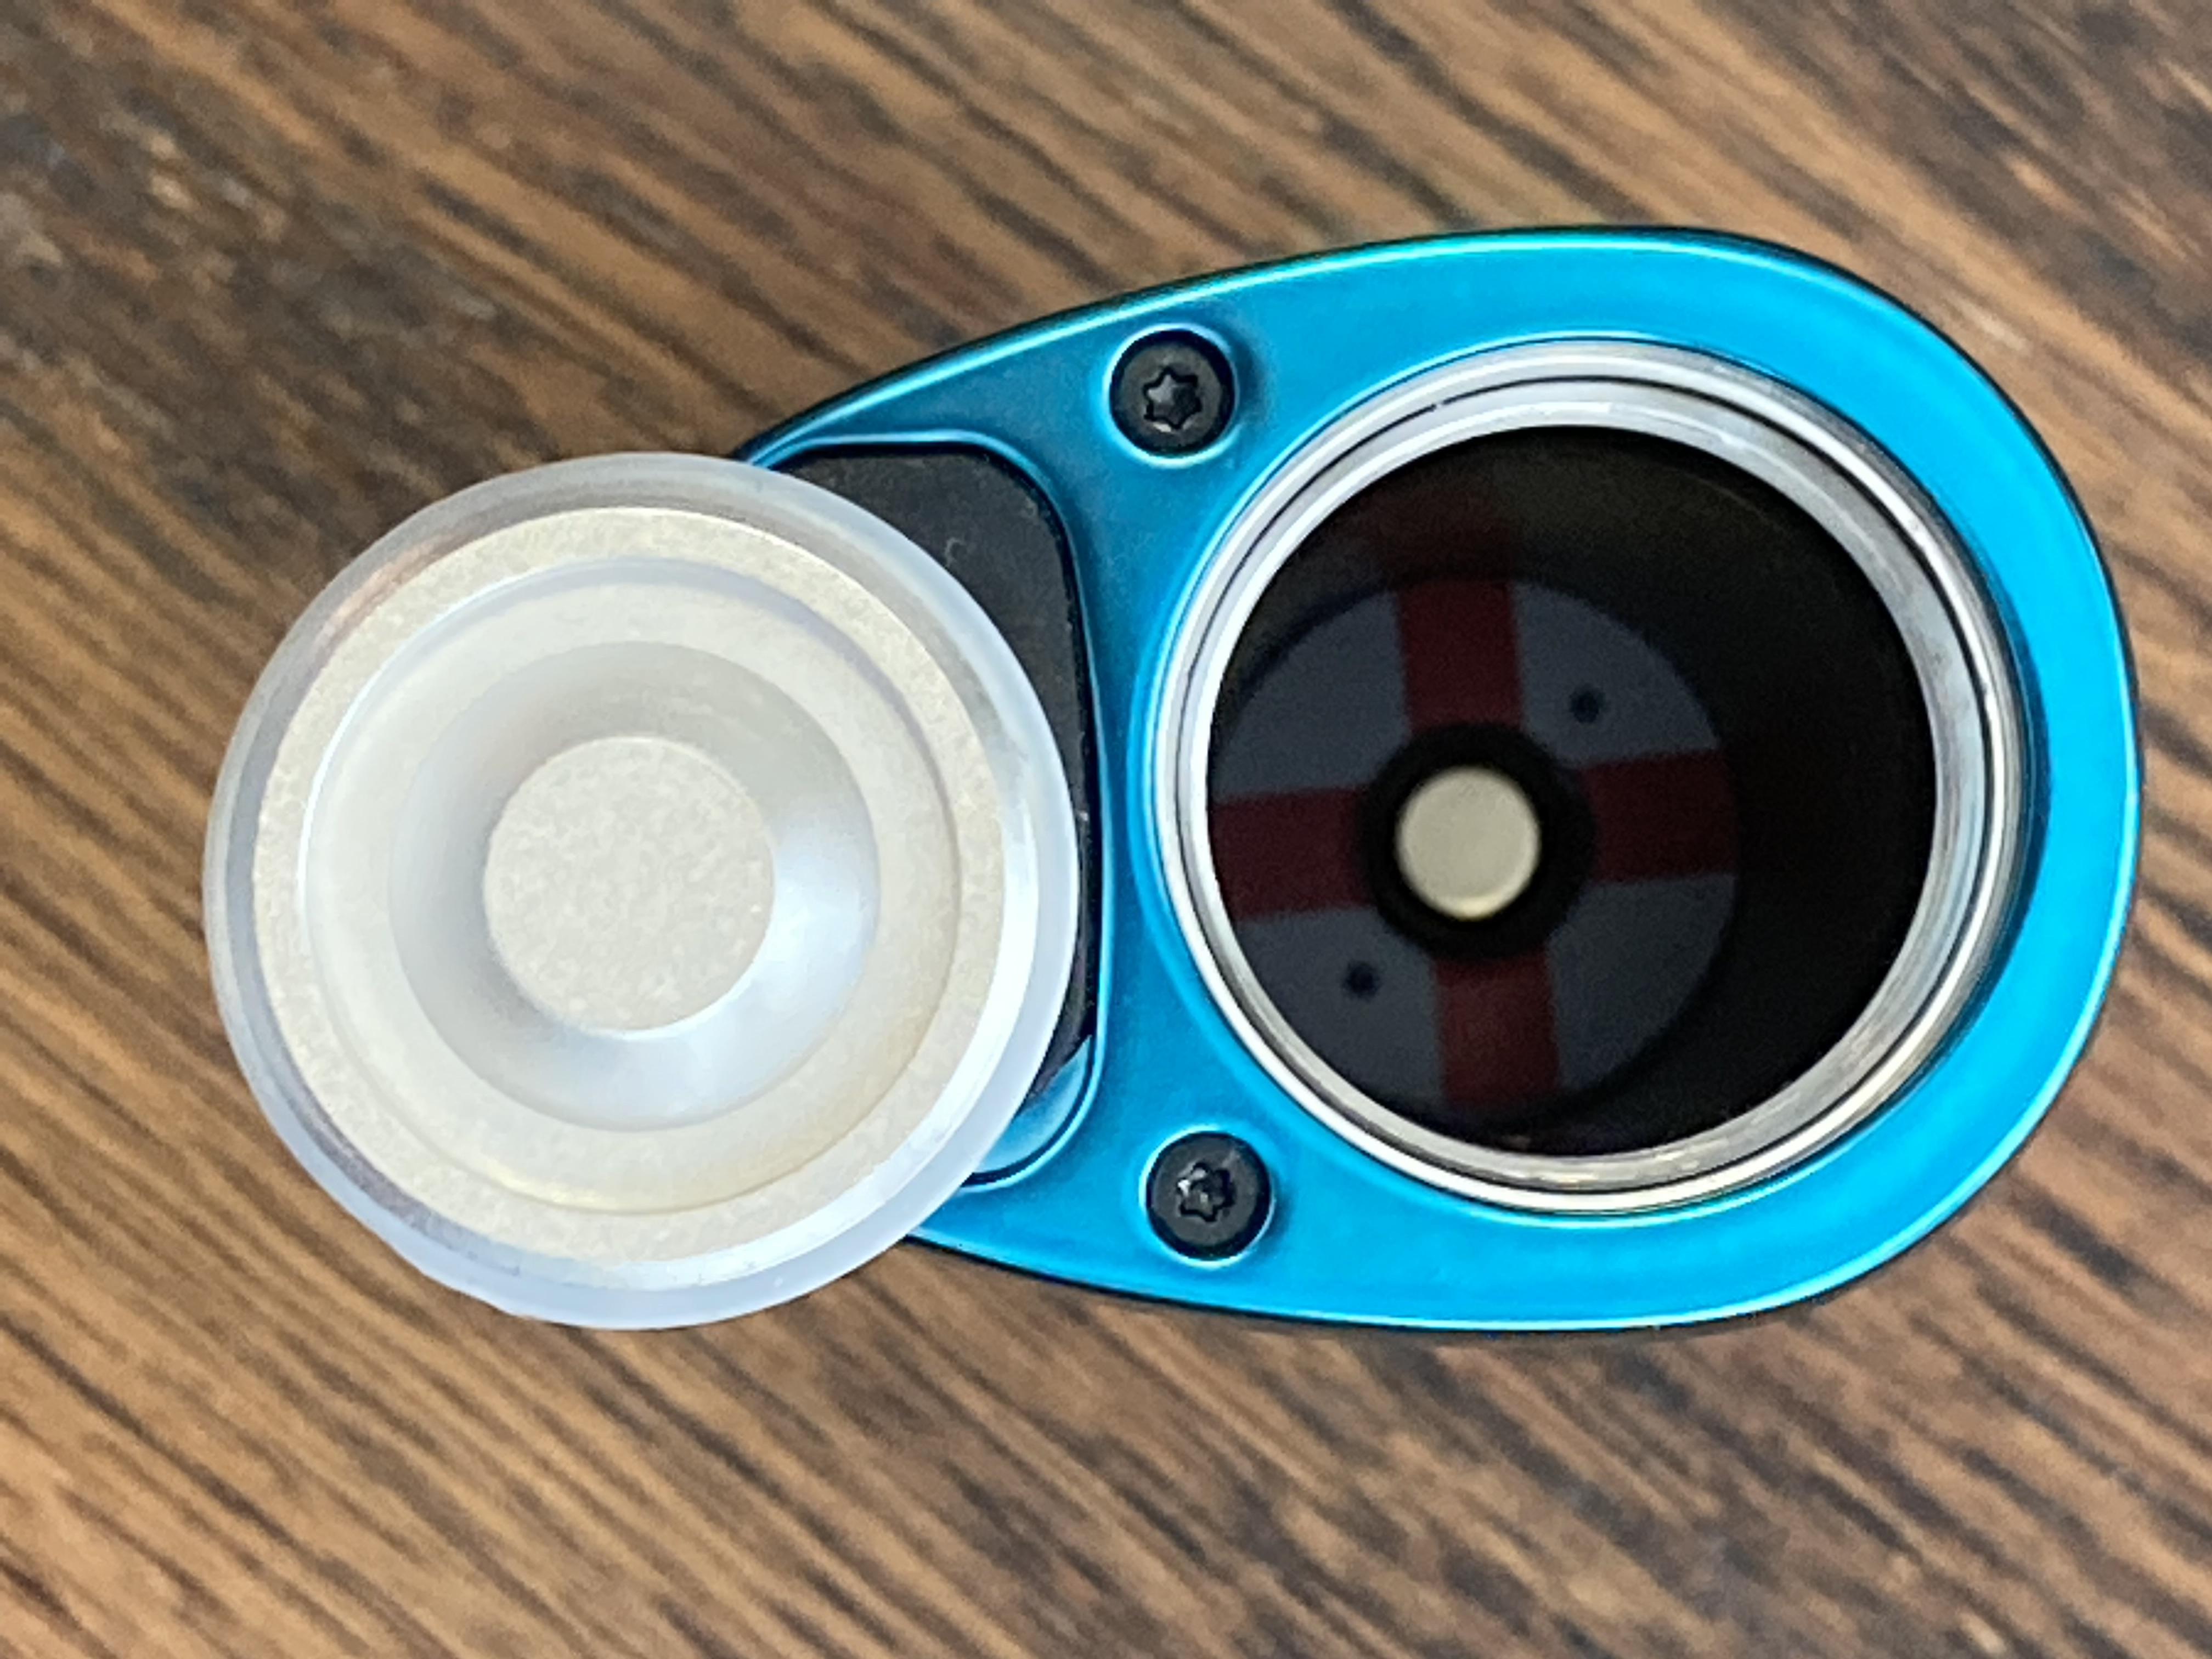
The tank that is included in the kit is the Unione PnM tank that I also received in the Vativ kit when I reviewed it. It is a very good tank and I have found the coils to be very good flavor producers. The pre-installed tank section has a capacity of 4ml while if you choose to use the bubble glass included then it has a capacity of 5ml. The drip tip included seemed very comfortable to use for me but it is a standard 510 drip tip if you would like to use your own. Once the drip tip is removed, you can use the included Oxva coin to put in the slot to unscrew the tank body to change the glass or clean the tank thoroughly.
The top portion of the tank pulls off of the base that has the 510 connection built in. It’s kind of a hybrid pod tank of sorts. The top portion of the tank is held in place with six magnets and does a good job of keeping the top portion secure in the base. Inside the base are the gold plated contacts that make connection with the coil that is simply a push in style. The airflow control is infinite and without a stop. I personally don’t love this. Since the tank portion is bottom fill with a rubber gasket then you have to remove the tank for filling and each time you put it back on then you have to reset your airflow. I feel like it had been a top fill instead then it would have been less troublesome.
The bottom of the tank has the Unione name etched in it along with what appears to be a date code and Justin Lai’s name. Also, the center pin for the 510 connection is gold plated.
Now let’s take a look at the Unibox mod. As I mentioned earlier, the Unibox is IP68. I received the gold blue edition. I like the color fade well enough but feel like the black leather with the red stitching doesn’t quite match. I’m not sure what would have been better. Perhaps just kept the entire body the same colors on metal.
There is minimal branding on this mod. The Unibox name is etched on one side while there is nothing on the other side. Then on the back is black leather with a crocodile type texture and the red stitching.
The top 510 plate of the Unibox has no screws holding it in place from the top like I’ve become used to seeing. I believe it is large enough to hold up to a 28mm atomizer. I’ll have to get out my big rta and give it a try.
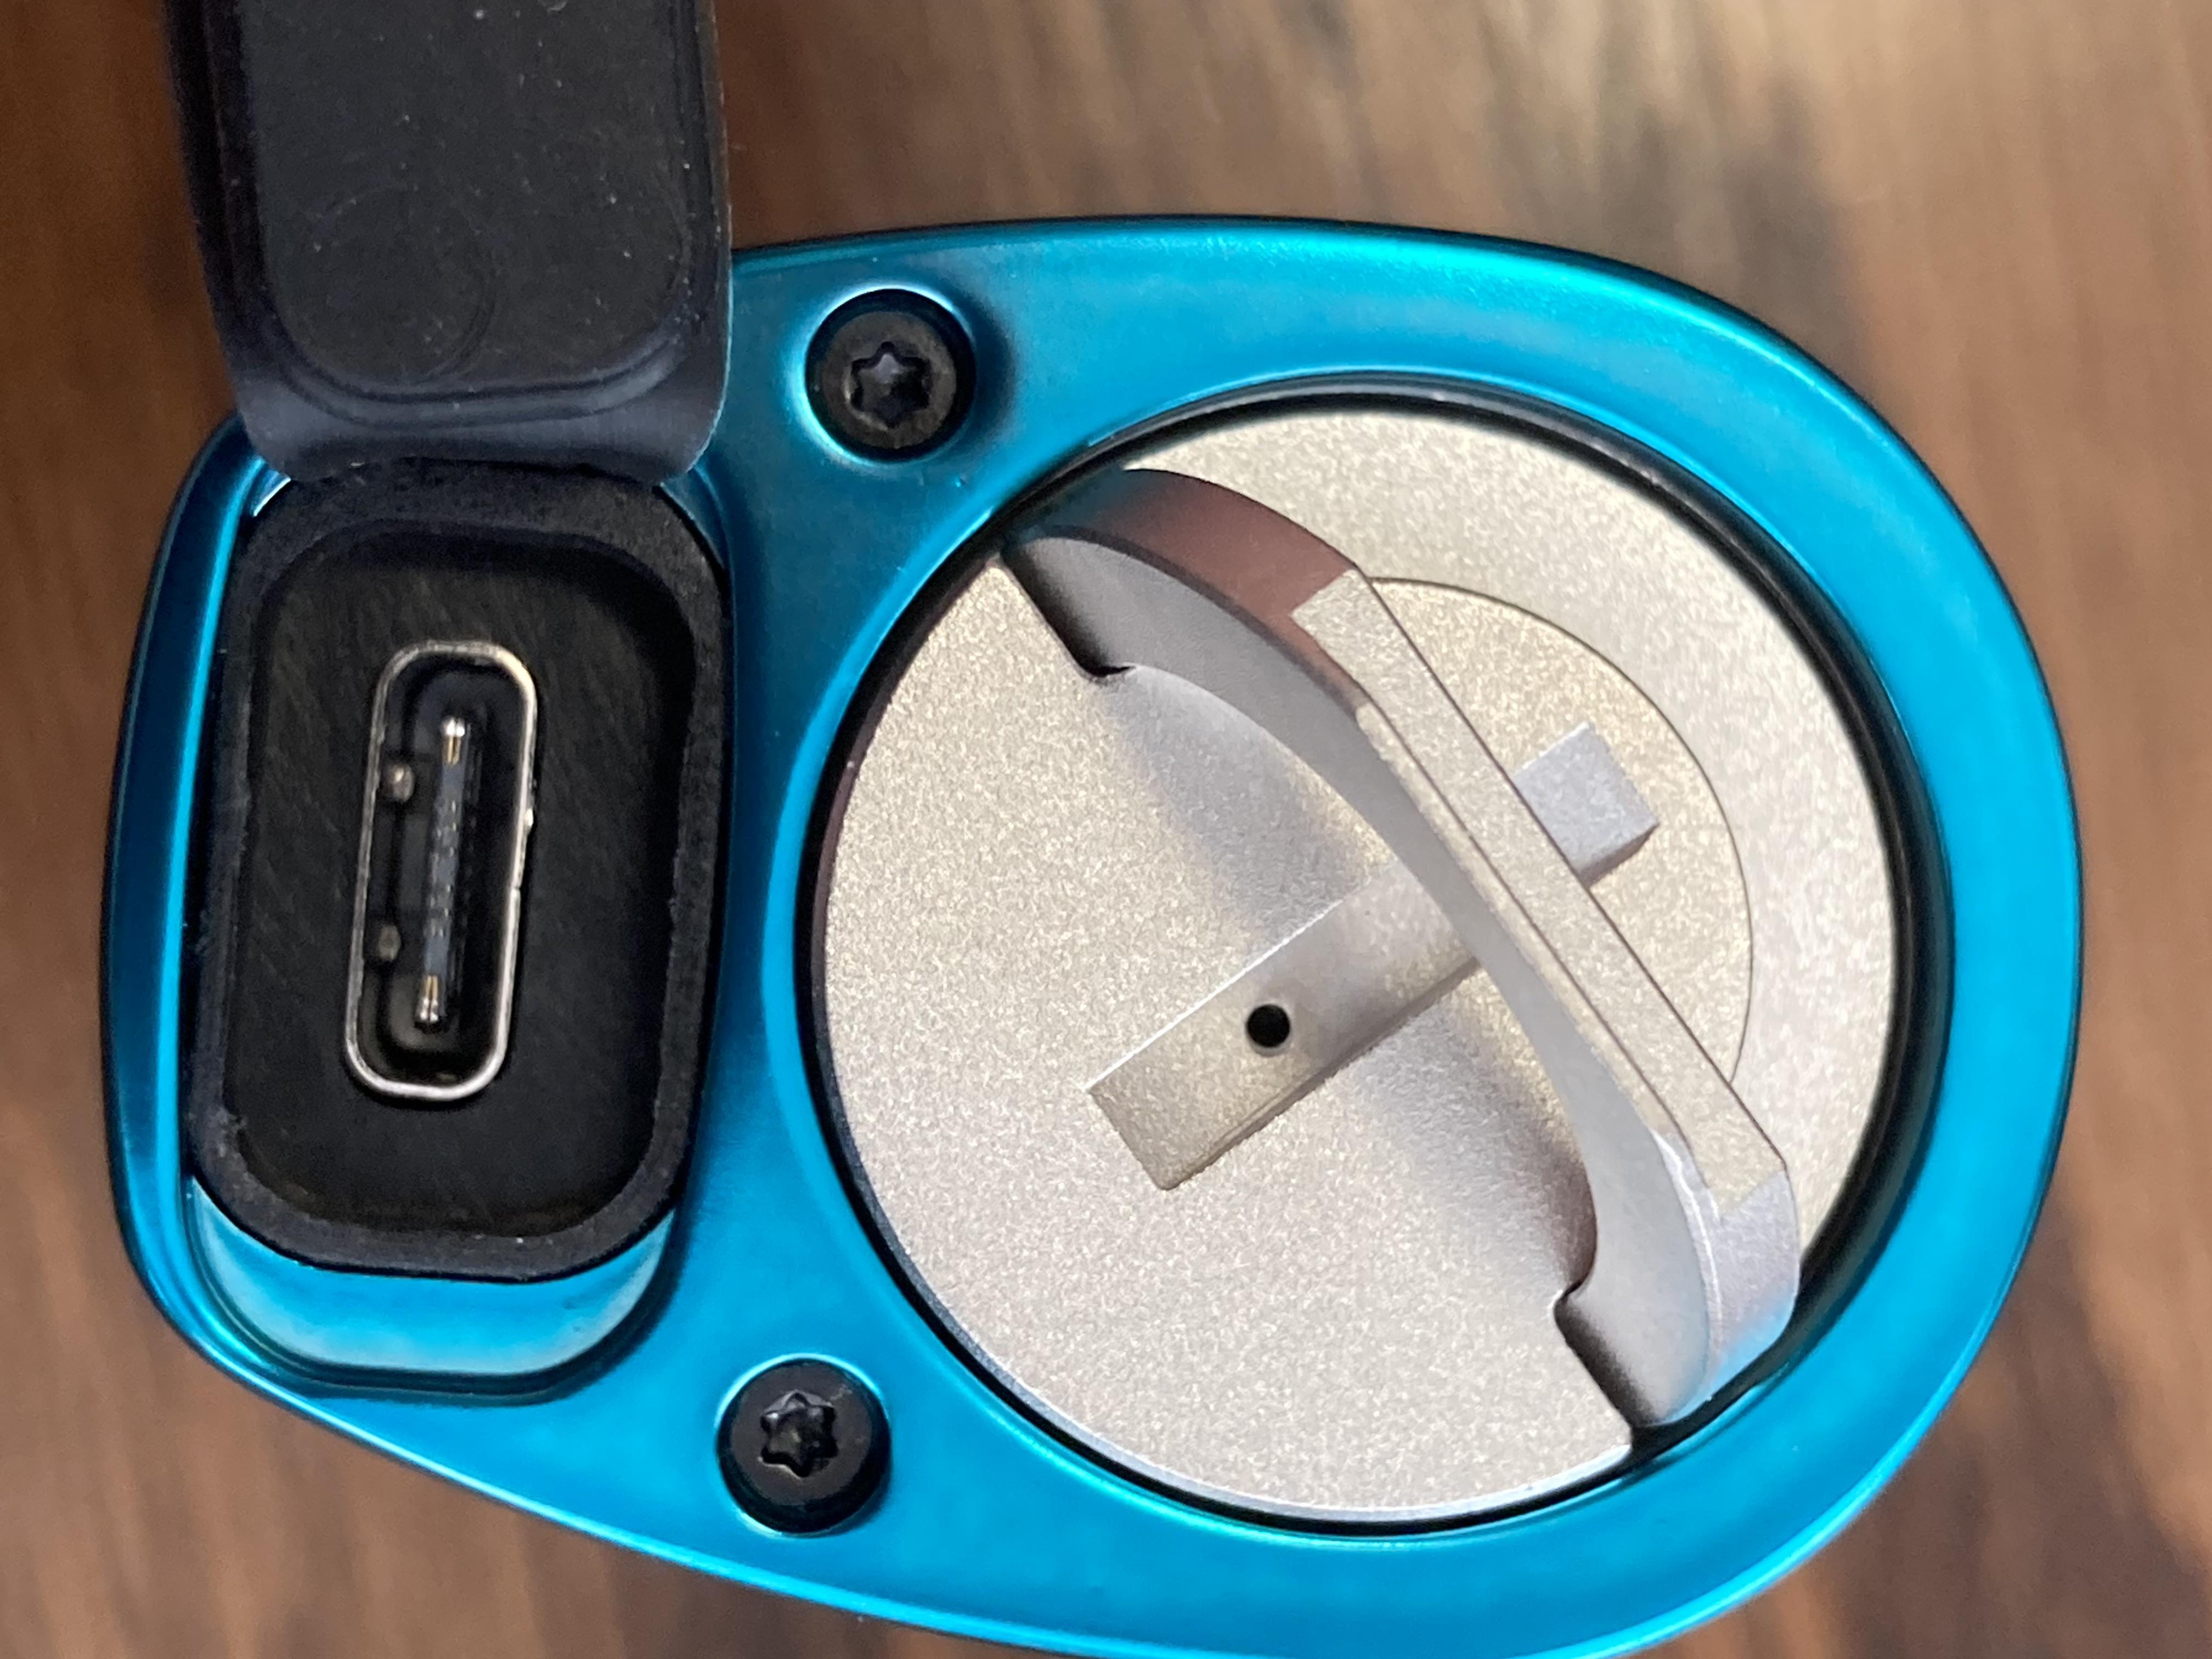
On the bottom of the Unibox you will find USB-C charging/upgrade port located underneath a rubber plug. Also this is where the threaded battery cap is located. From the outside it appears there are a couple of battery venting holes but none on the inside. I don’t see how it could be IP68 if there were holes through to the inside. The bottom side of the battery cap is not marked but the inside of the mod is marked with a large red + to indicate battery polarity.
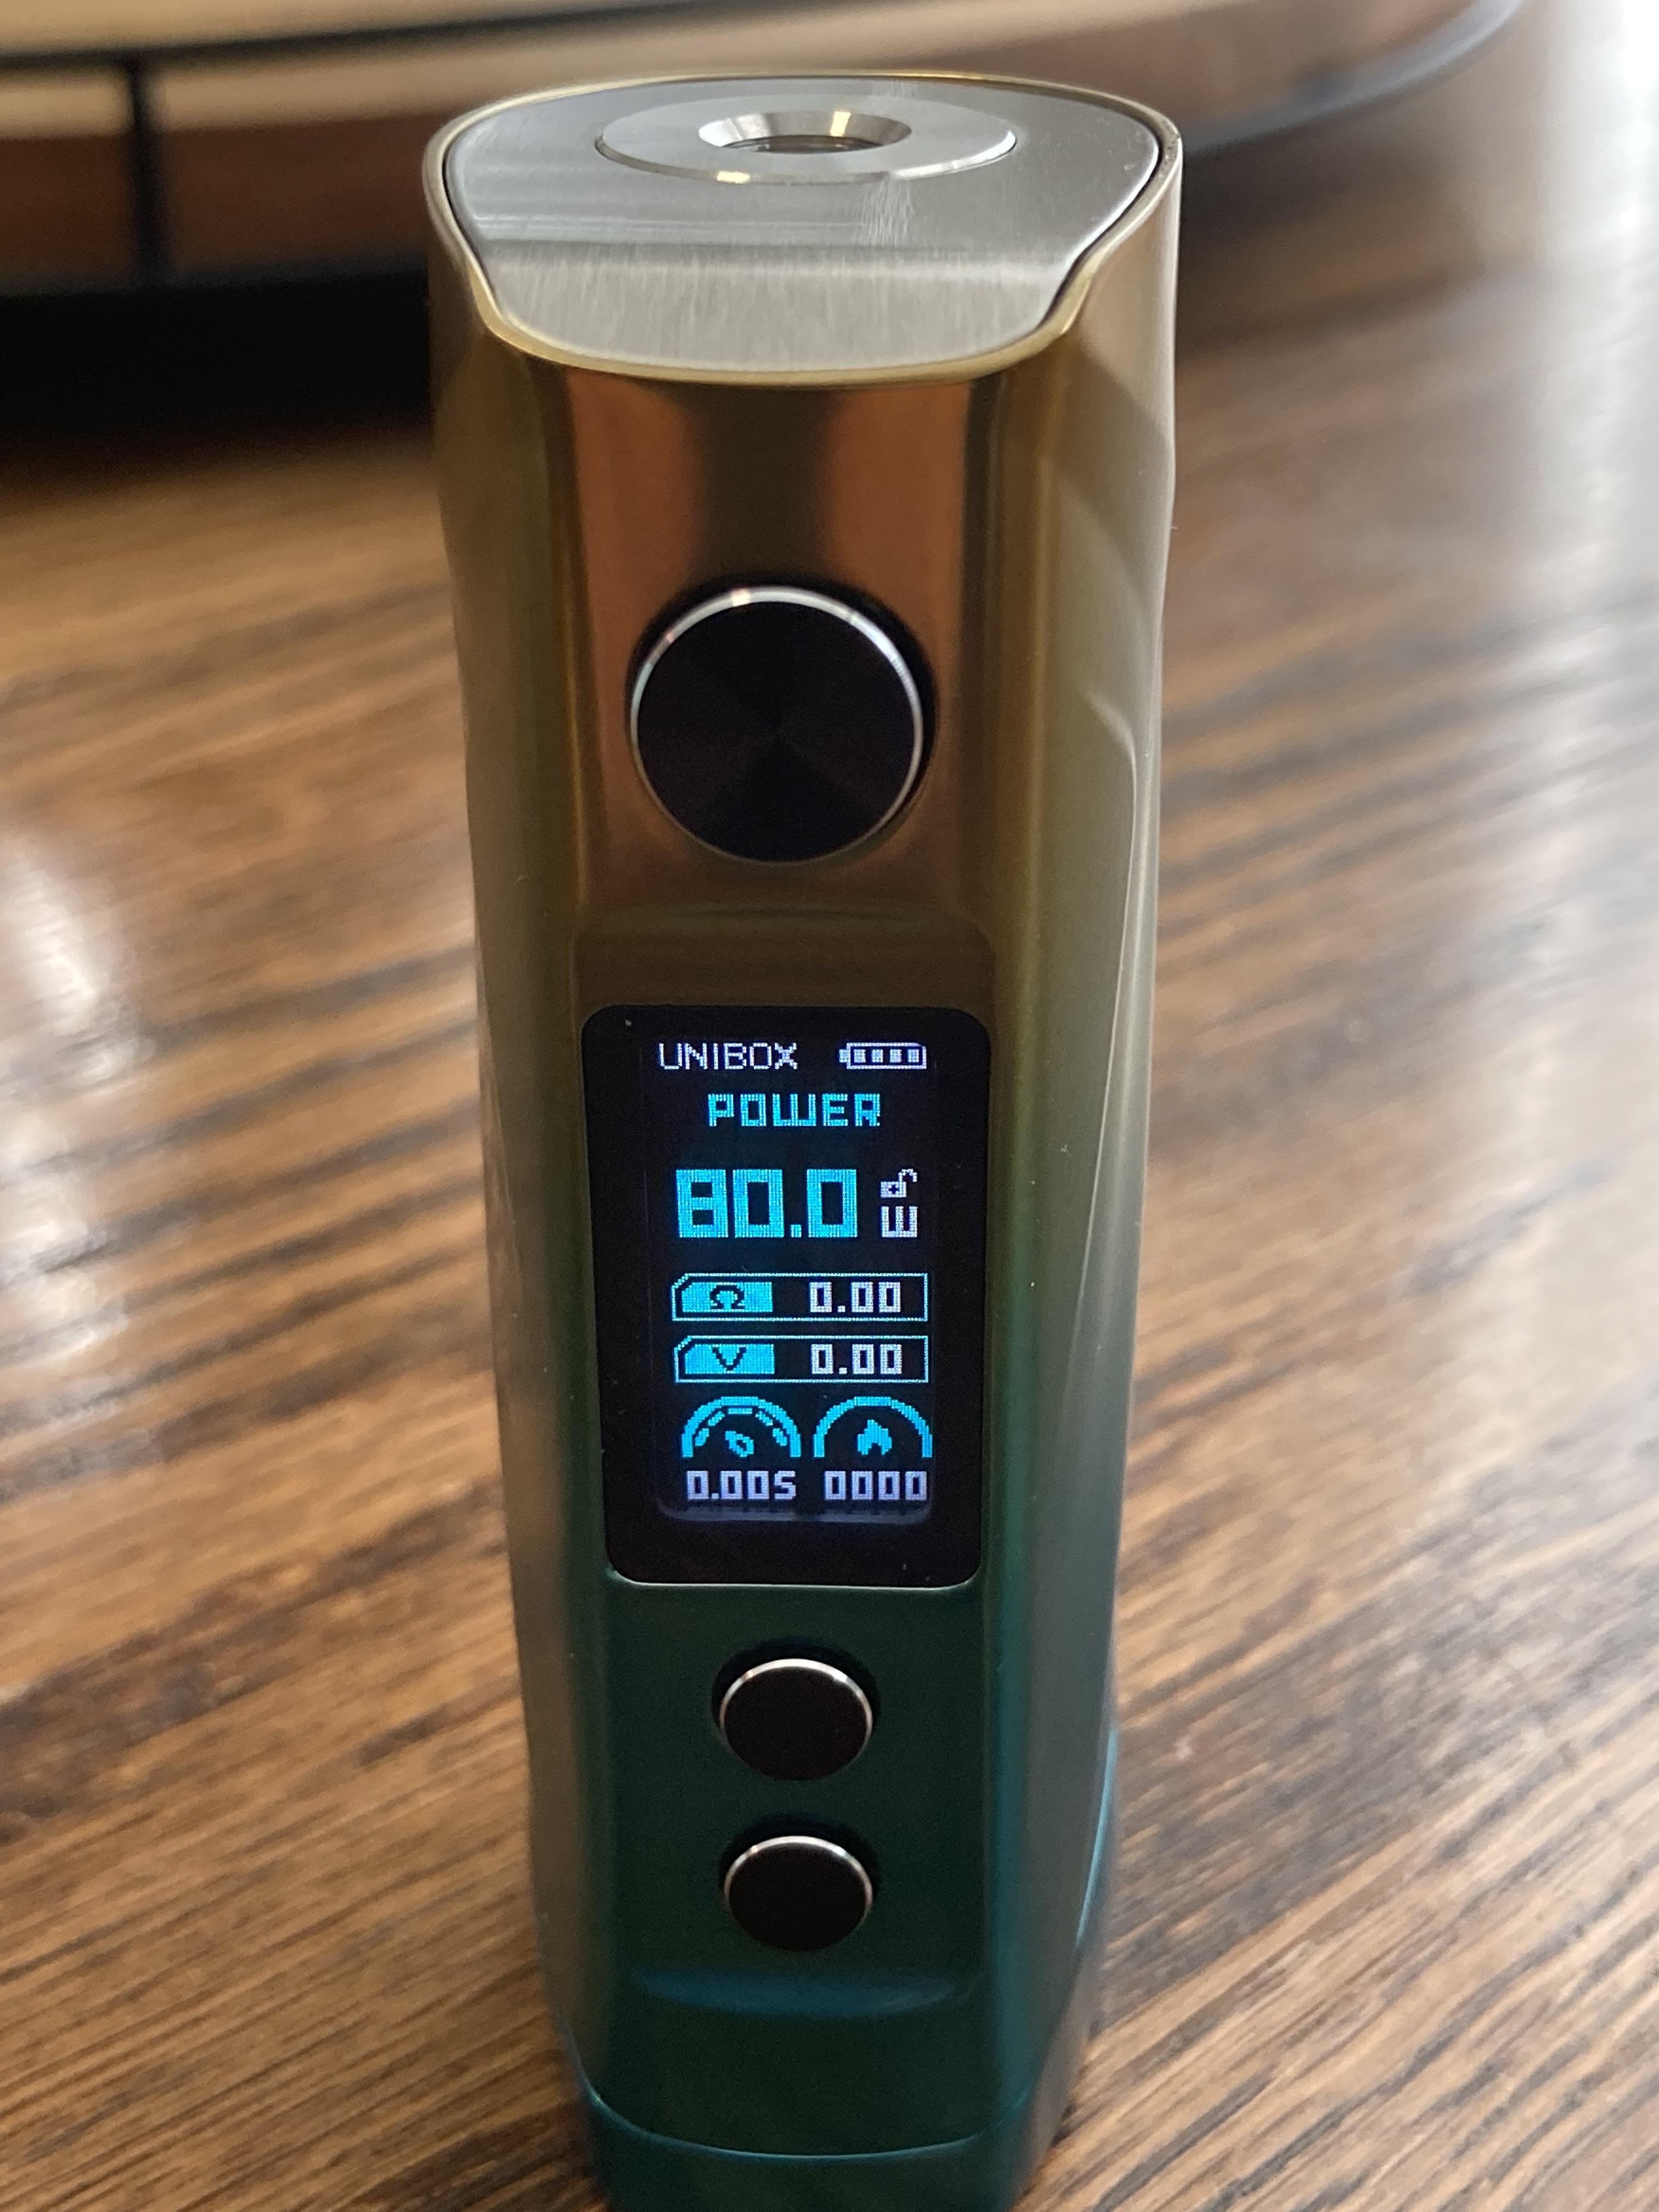
The front of the mod has the round fire button near the top with the crisp display screen underneath that. Below the screen are the + and - buttons. The display shows the following information.
- Unibox name and battery level indicator
- Mode of operation
- Set wattage and unlock/lock symbol
- Coil resistance
- Output voltage while firing
- Length of current puff and puff counter
The button operation is as follows.
- Press the fire button 5X to turn the mod on/off
- Press the fire button 3X to highlight the mode and then the + and – buttons to change mode
- Press the + and – buttons to lock the adjustment buttons but the mod will still fire
- Press the fire button and the – button to change the display color
- Press the fire button and the + button to adjust the screen brightness then use the + and – buttons to adjust the level
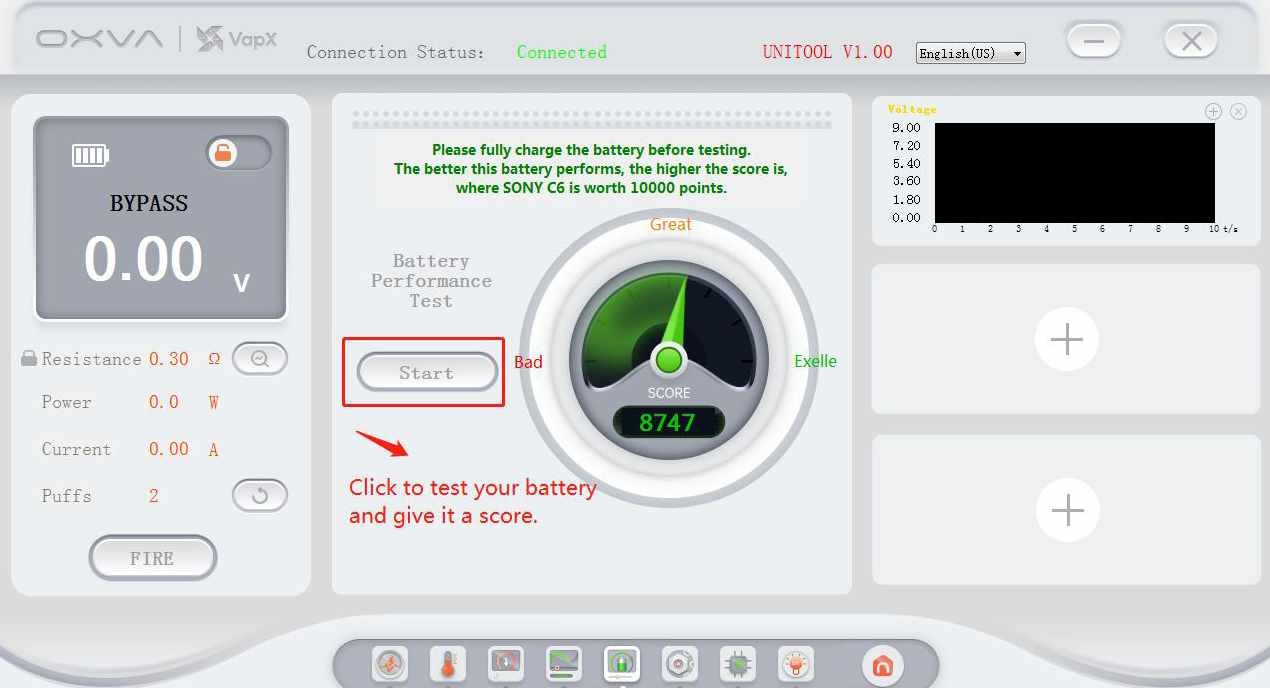
You might be thinking by now that this all sounds like just another 18650 mod kit. Well, it’s not. Besides the normal modes of operation like VV, VW, TC-SS, TC-Ti, TC- Ni, TC-TCR, VPC, and Bypass, there is also a new function that I have not seen before which is Rate Battery. You install a fully charged battery and press the fire button. The mod automatically switches to Bypass mode for three seconds and tests the battery and gives you a rating.
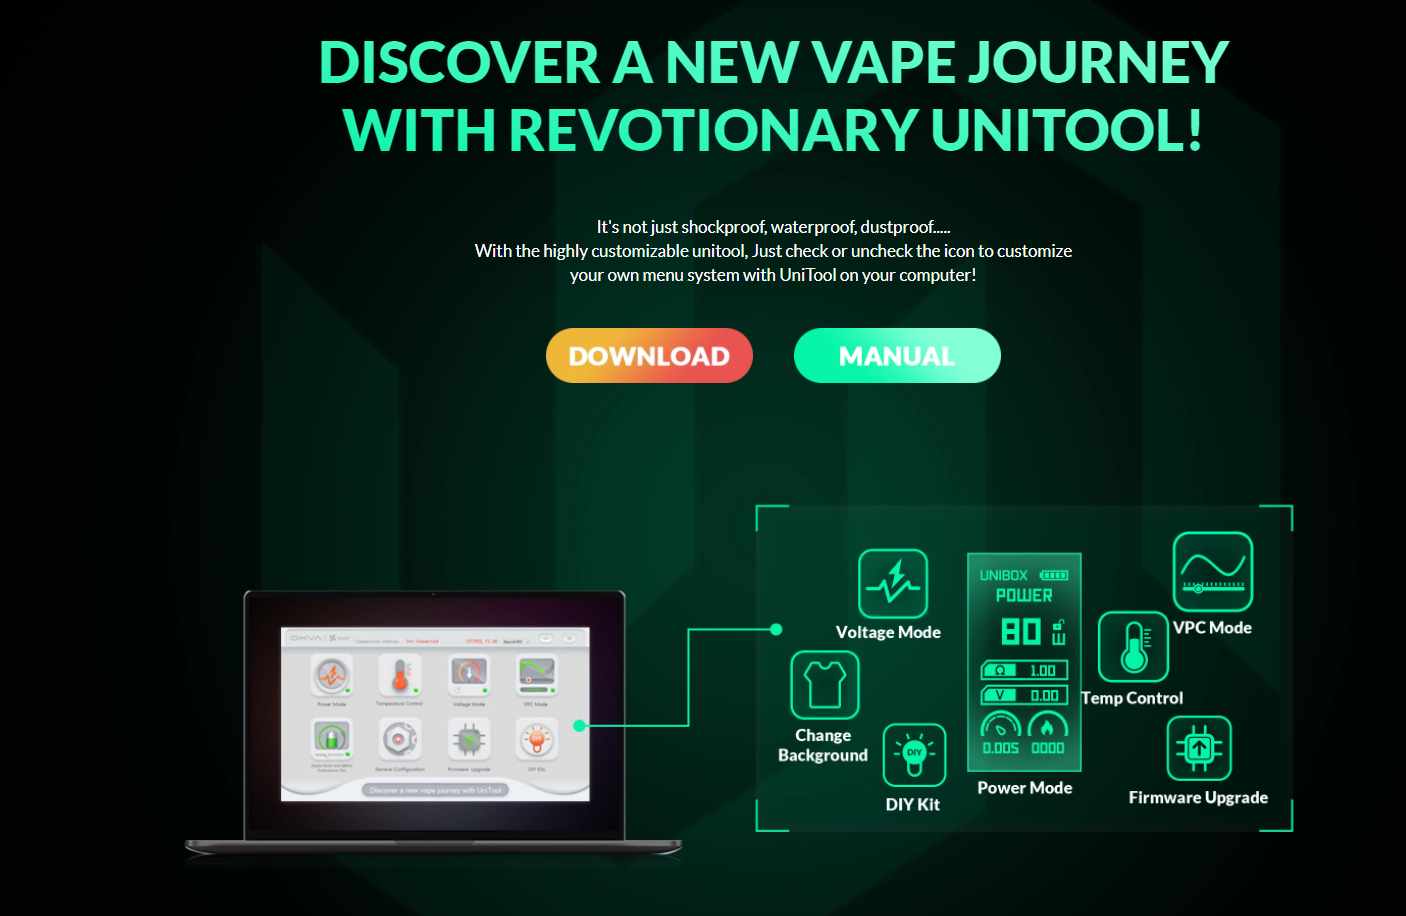
So is this everything? Not yet. Besides the Unibox and PnM tank working very well together, there is one more thing. There is a software package that you can download from the Oxva website that allows you to connect the mod to your computer and make changes to the mod from within the software. This software is called Unitool. I’ll give a basic outline of the software. Not only can you make changes to the mod but there is also a DIY tool built in that reminds me of the steam engine tool. Below is a picture of the main screen you will see when you first open the Unitool program. The DIY option is useable without connecting the mod but you need to have to have the mod connected to access the other options. I recommend using the included cable since you have to have a cable that is capable of carrying data. Not all cables can do that. Some are only good for charging which I discovered when I tried a cable that I already had plugged into my computer.

Once the mod is connected then you can go into the different modes to make changes. Below is the screen you will see once you click on the Power or Voltage mode buttons. Inside this screen you will see your power setting along with coil resistance and can actually fire the mod by clicking the fire button to test it. You can also choose between .1, .5, and 1 watt increment adjustment on the mod. I think this is a really good idea and would like to see it as an option on other mods. You can also choose between Soft, Normal, and Hard output modes.

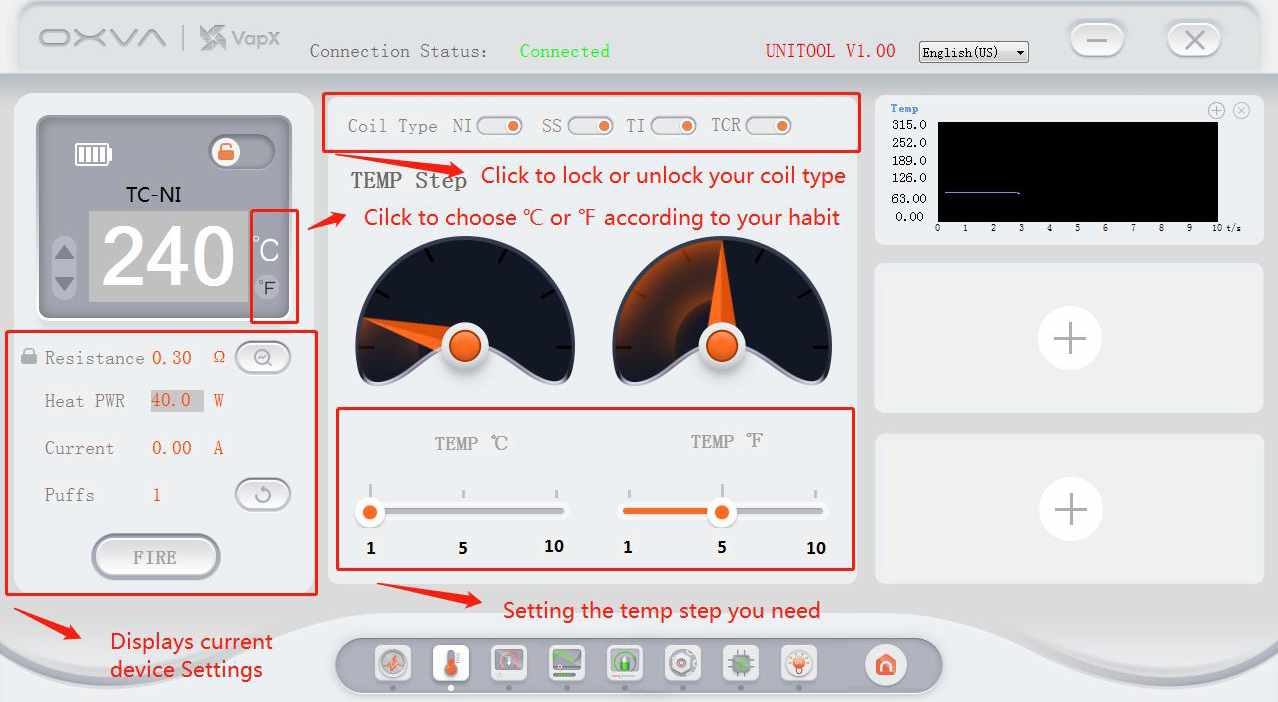
Next is the Temperature Control screen. Here you can also fire the mod to test it and change your TC settings. You can also set the scale to either Degrees Fahrenheit or Celsius as well as choose between 1, 5, or 10 degree increments on the mod. You also select your coil type in this screen.
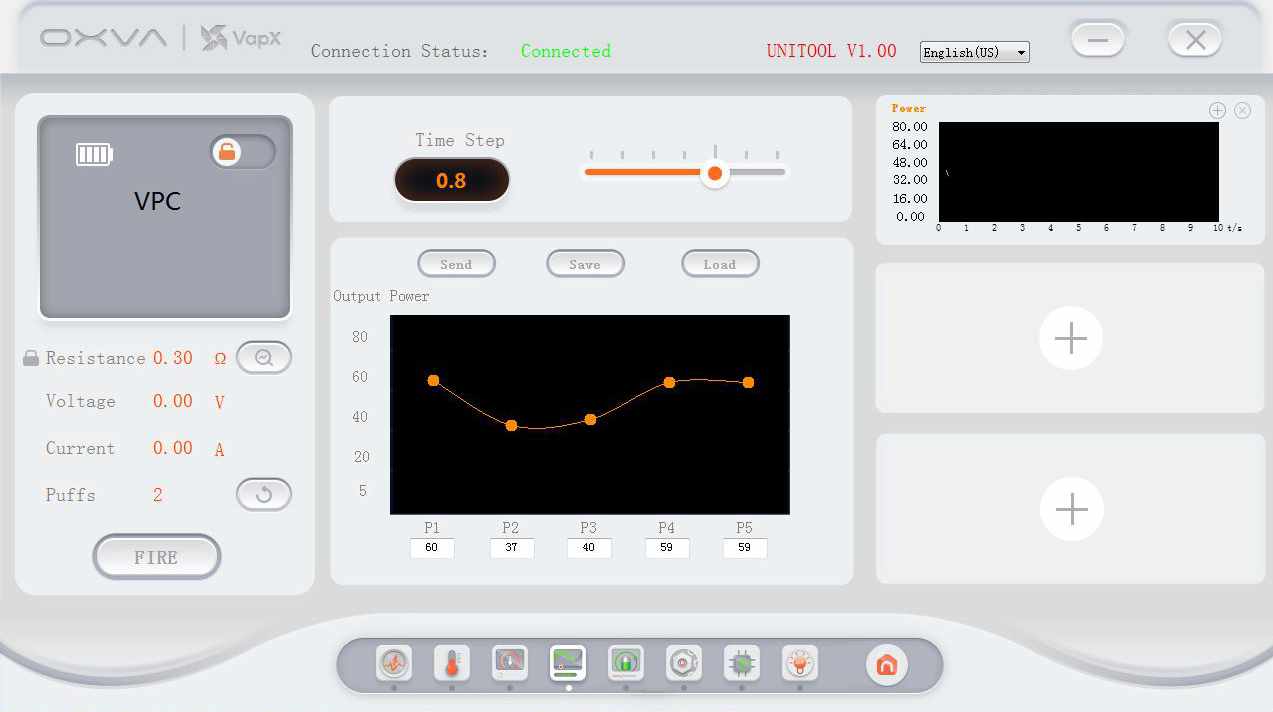
The next screens are VPC (variable power curve), and Bypass. I personally don’t use VPC very often but it’s really nice to be able to do those settings on a computer instead of trying to click through them on a mod. On the Bypass mode you can also test your battery.
Next is General Configuration tab. In this tab you can upload an 80 x 160 image for a background as well as set maximum puff time, screen timeout, sleep timer, and screen brightness.

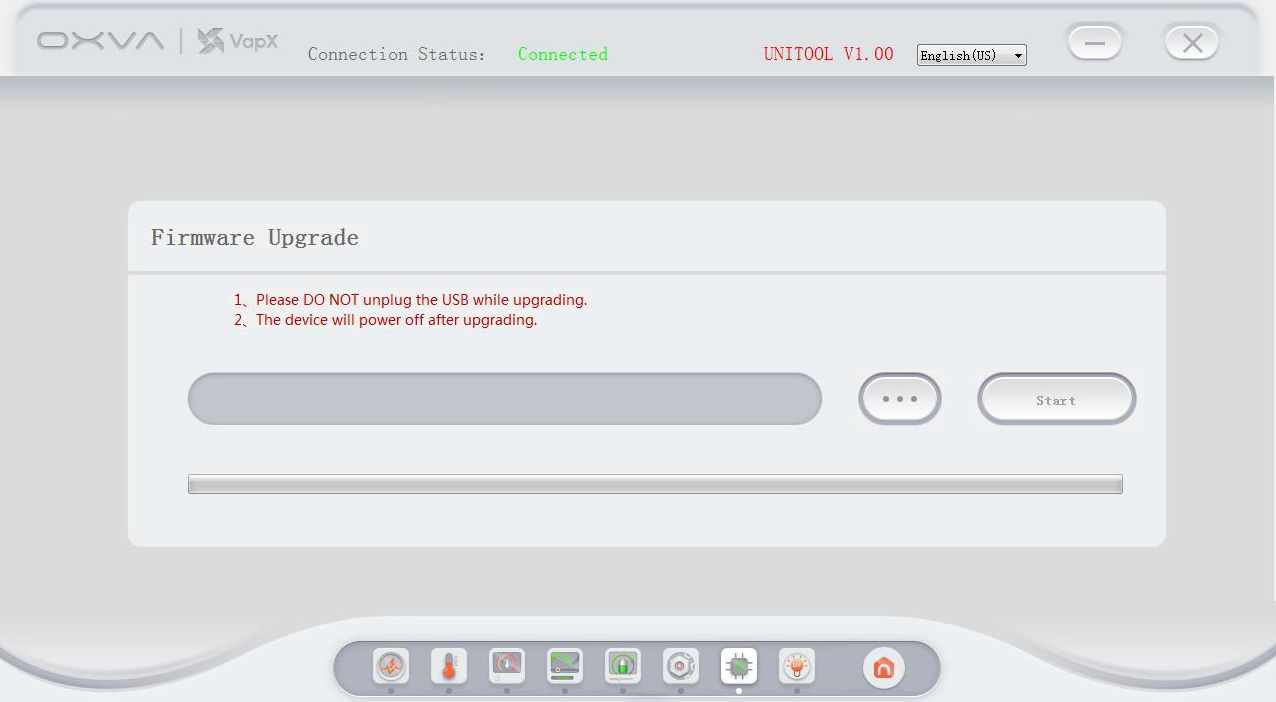
Next is the Firmware upgrade screen which is pretty much self-explanatory.
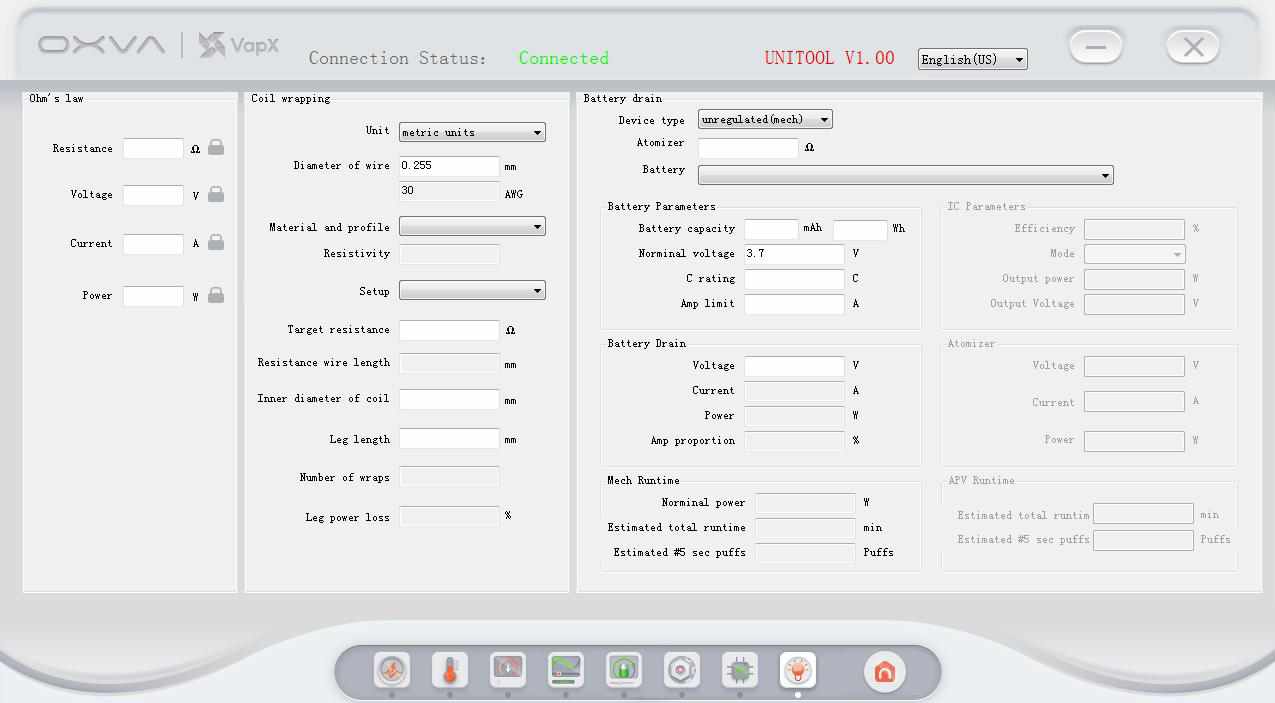
Last but not least is the DIY Kits tab. Inside this tab you can use an Ohm’s Law calculator, use the Coil Wrapping guide and use the Battery Drain tool.
FINAL THOUGHTS:
I very much have enjoyed testing the Oxva Unibox PnM kit. Having already used the tank on my last review, I knew exactly what to expect which is good flavor and large amounts of vapor. Both coils performed very well although I did run them a bit under the recommended settings. I just can’t do a really hot vapor.
From the mod being IP68 rated to having a plethora of functions as many mods do these days there is really nothing I didn’t like about the mod. Also having the convenience of being able to change settings and test the battery as well as the convenience of having the DIY Kit on the software package, there seems to be something for everyone whether you are a simple user that will just use the mod in power mode all the time or someone who likes to fiddle with settings and change things like uploading a picture for the background. You don’t have to download the software to use the Unibox but I would recommend it if you build your own coils so you will have the DIY Kit on your computer for easy access.
I’d like to thank Oxva and Sam for sending the Oxva Unibox PnM kit for this review. A big thanks to the readers for hanging in there until the end. I know this one got a little long but there was a lot to cover. Below is a link to the Oxva website if you’d like to look around. Besides the Unibox, they have a pretty good assortment of devices and tanks.
Reference:
Article Author:Hittman
Article Title:OXVA AND VAPX UNIBOX PnM KIT review by hittman
Source: E-cigarette Forum
Read more on OXVA VAPE REVIEW
Recommend Vape Collection:
OXVA VAPE KITS
OXVA Unione PnM Tank


